

How do I use gpt-image-2 in Codex?
How do I use gpt-image-2 in Codex?
You do not need to switch the Codex model to The highlighted area in this screenshot shows where to add them: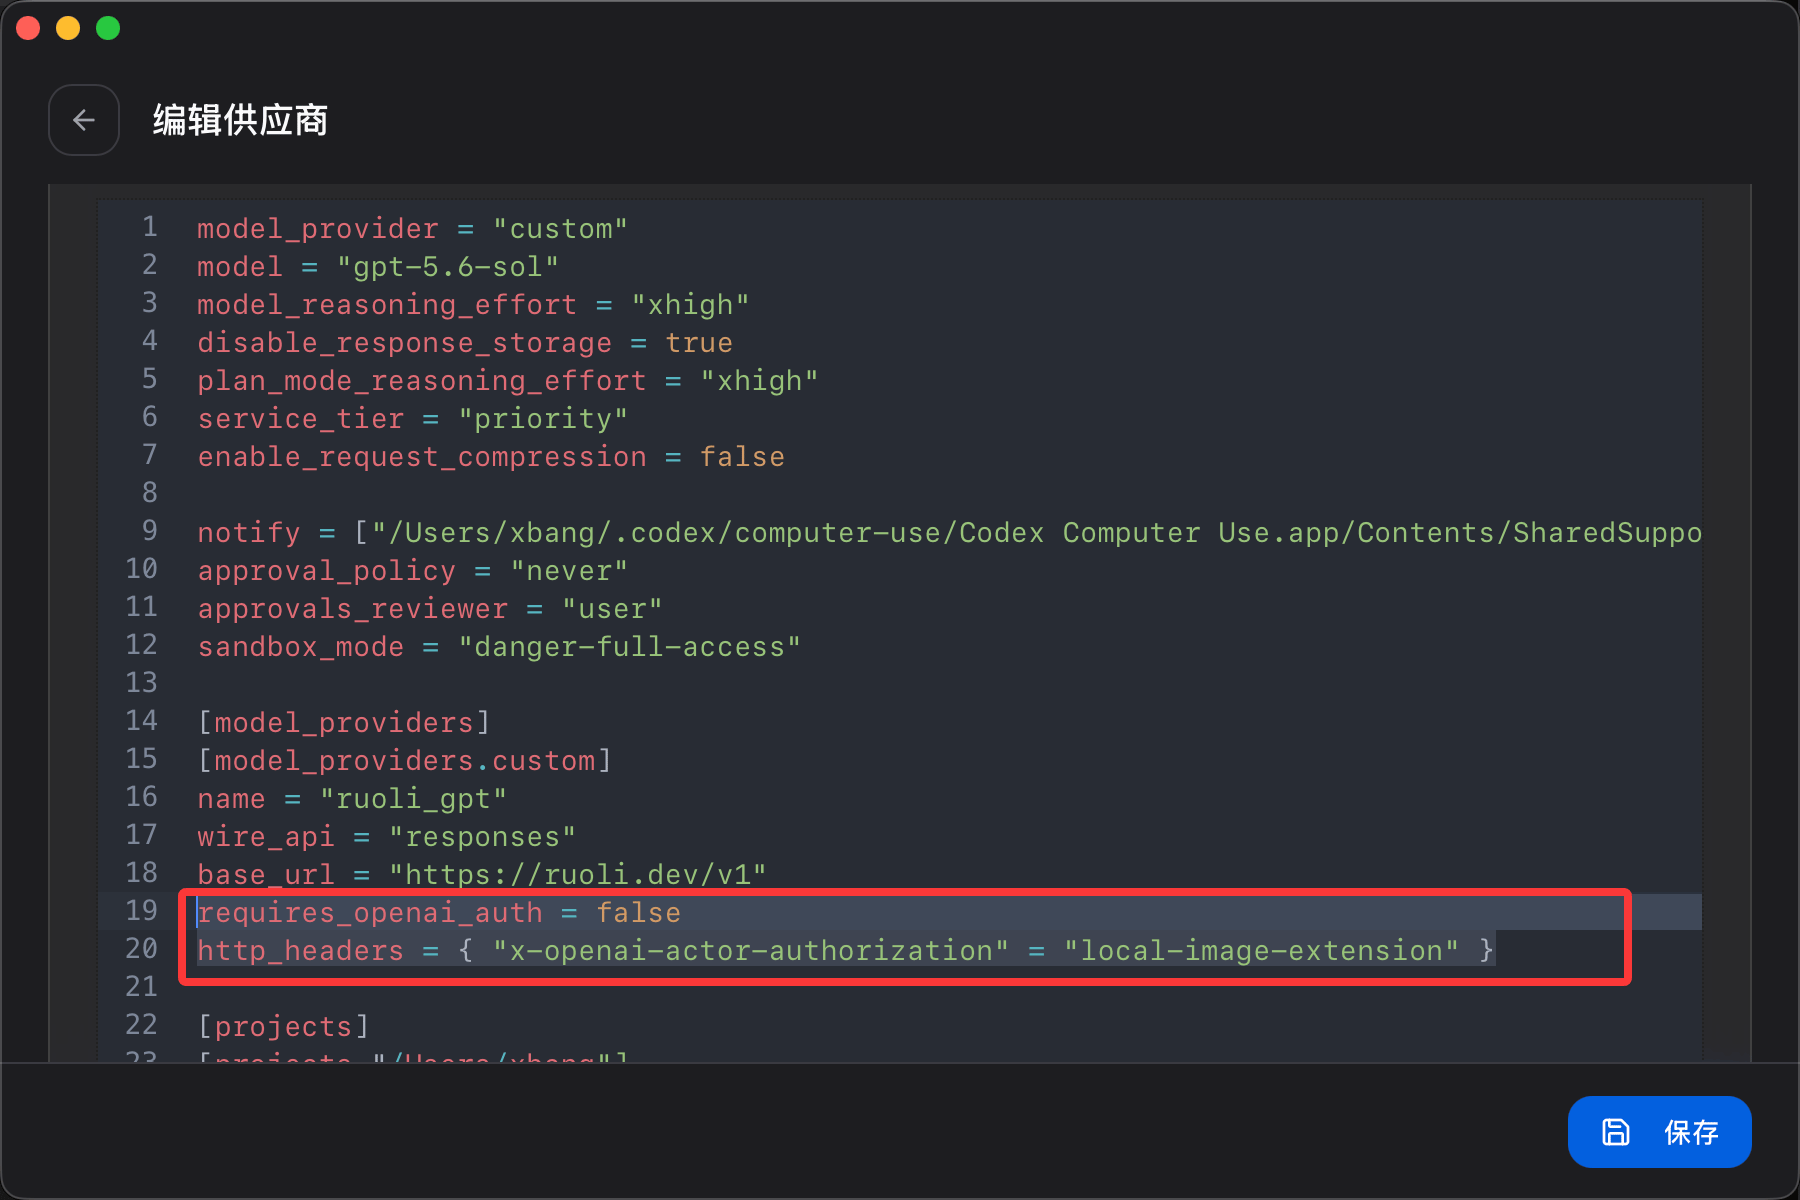
gpt-image-2.Keep gpt-5.6, or another conversation and coding model, as the Codex main model. When you ask for an image, Codex calls gpt-image-2 in the background.Step 1: Configure Codex normally
Follow the Codex setup guide to connect Codex to ruoli:Step 2: Enable image generation
Open CC Switch and go to Codex → Edit Provider → Config JSON.Find the active[model_providers.your-provider-name] section and add these two lines:Step 3: Describe the image to Codex
You do not need an API command or a model switch. Ask Codex directly:gpt-image-2 automatically.Your token must use the
gpt-pro group. If you get a “no available channel” error, check that the token uses the correct group.How do I call the image generation API?
How do I call the image generation API?
To generate images from your own program, script, or website, call the image API directly. This method does not use Codex.Prepare these three values:The text after
Direct API example
Replacesk-YOUR_KEY with your token, then run:prompt describes the image. Replace it with your own description.New to coding? Let an Agent configure it
Paste the following prompt into Codex or another coding Agent. Replacesk-YOUR_KEY with your token:How do I enable Fast mode in Codex?
How do I enable Fast mode in Codex?
Think of Fast mode as a priority lane for Codex. When enabled, requests use the To turn Fast mode off later, remove the
priority service tier.1
Open the Codex Config JSON
Open CC Switch and go to Codex → Edit Provider → Config JSON.
2
Add the Fast mode setting
Find the general settings near the top, alongside options such as The highlighted area in this screenshot shows where to add it: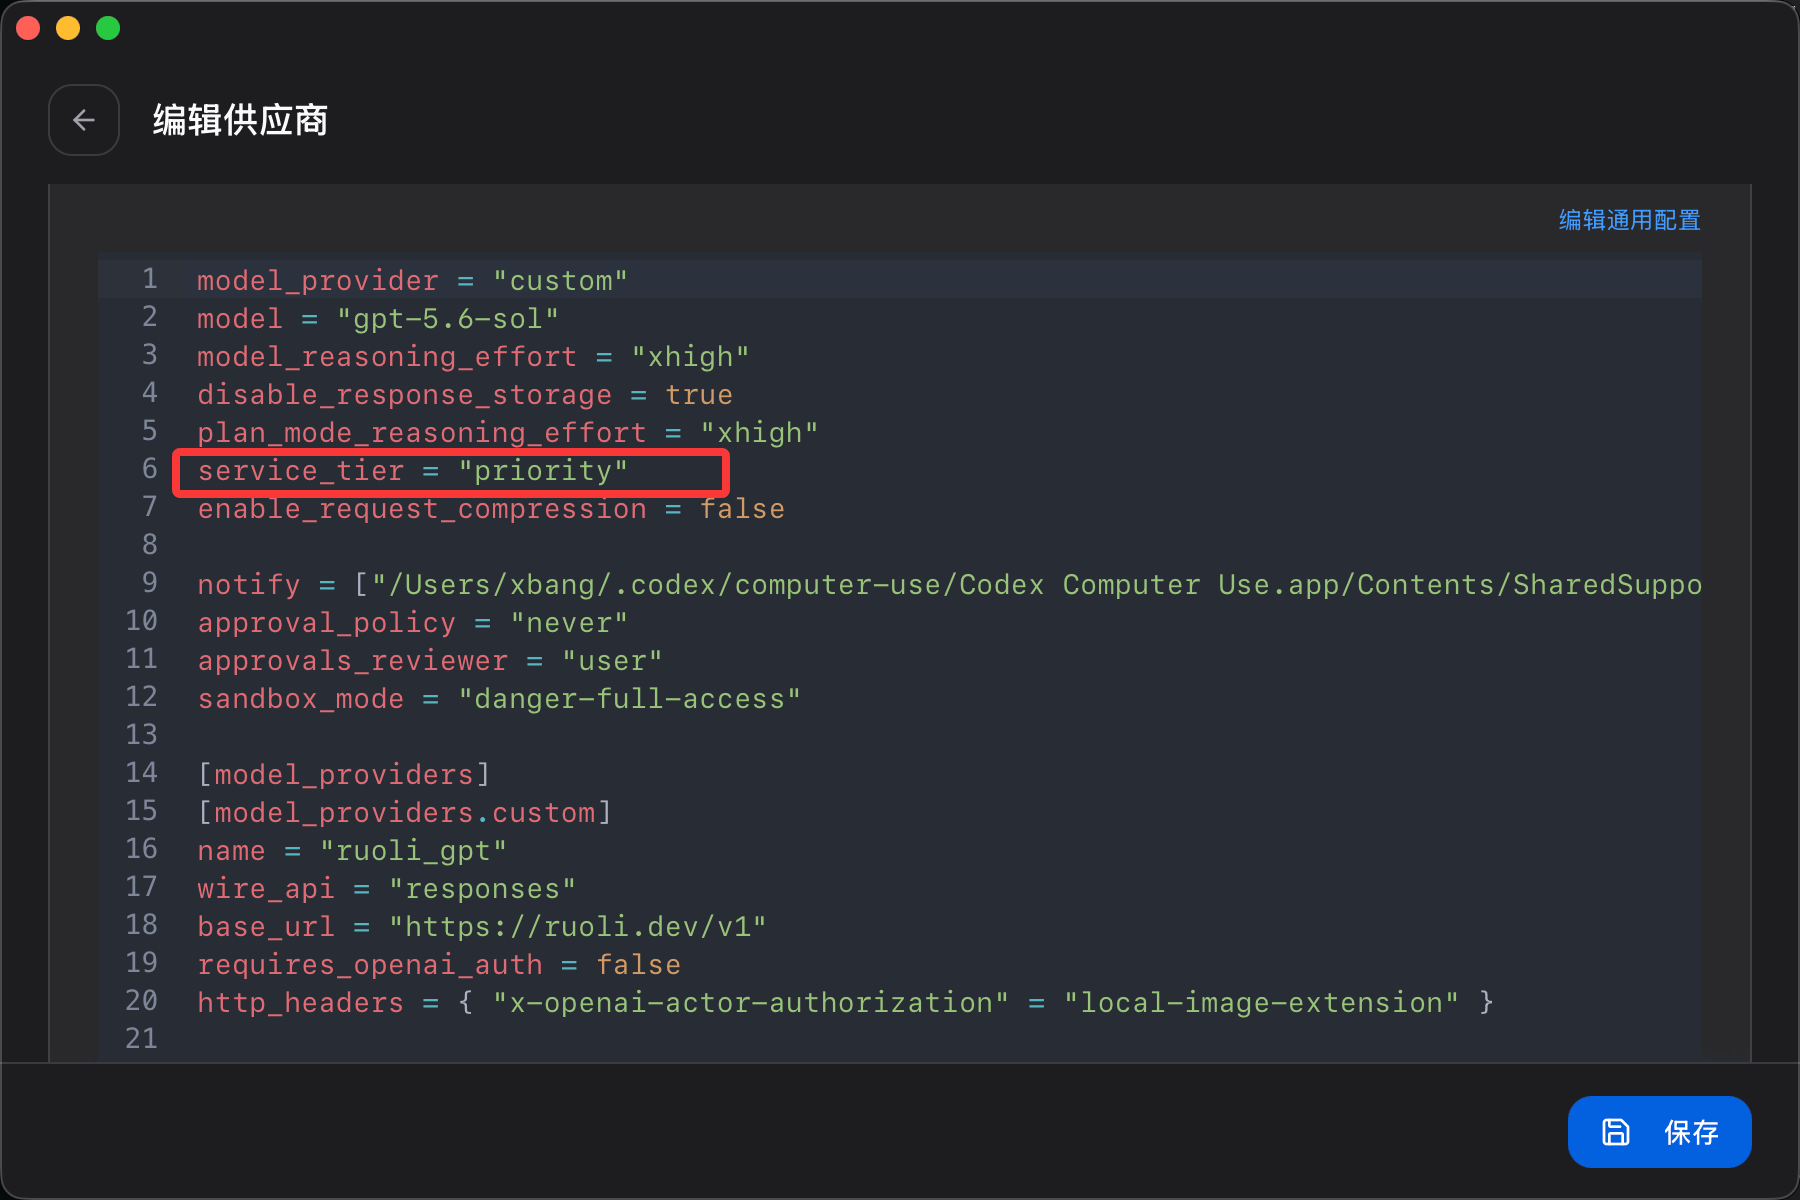
model and model_reasoning_effort, then add this line:3
Save and restart Codex
Click Save, fully quit Codex, and open it again. Fast mode will take effect after the restart.
service_tier = "priority" line and restart Codex.How to fix 401 Invalid token after updating Codex
How to fix 401 Invalid token after updating Codex
After updating the Codex CLI or App to version 149, you may see this error as soon as you send a request:Think of it this way: the key is not necessarily broken; the new Codex version may not be carrying it in the way the relay expects. Enable OpenAI authentication in the provider configuration.
1
Open the Codex Config JSON
Open CC Switch and go to Codex → Edit Provider → Config JSON.If you do not use CC Switch, open
~/.codex/config.toml directly.2
Find the active provider
Check the Then find the provider section with the same name:Your provider may have a different name. Use the name from your own configuration.
model_provider value near the top of the file:3
Enable OpenAI authentication
Add this setting inside that provider section:The completed section should look similar to this:
4
Save and restart Codex
Save the configuration, fully quit the Codex CLI or App, and open it again. Send another message; the
401 Invalid token error should normally be gone.This fix is for
401 Unauthorized: Invalid token errors that started after updating to version 149. If the error remains, check whether the API Key is correct, active, and free of leading or trailing spaces.What should I do if I see Stream disconnected before completion?
What should I do if I see Stream disconnected before completion?
This error means the connection ended before Codex finished its response. It does not always mean the relay service is down. Check these four causes in order.
1
Check your network
An unstable connection is the most common cause. If the network briefly drops, the Codex response can stop as well.Try the following:
- Turn your proxy or VPN off and on again
- Switch to another proxy node
- Switch between Wi-Fi and a mobile hotspot
- Send the same question again after the connection recovers
2
Check whether the conversation is too long
A longer conversation gives Codex more context to send with every request. The request may fail when that content exceeds the model’s context limit.The easiest fix is to start a new conversation and ask again.If the new conversation works, the old one was probably too long. To preserve important information, ask Codex to summarize it first, then paste the summary into the new conversation.
3
Check whether the request triggered a safety refusal
OpenAI may refuse requests involving illegal actions, malicious attacks, dangerous behavior, or other high-risk content. The connection may end before a complete answer is returned.Check whether your question could be interpreted as harmful. Rewrite it to describe a legitimate, safe purpose. Do not try to bypass the model’s safety restrictions.
4
Check the relay service
If the network is stable, a new conversation still fails, and the question is safe, the relay channel may be temporarily unavailable.Check the group messages for an outage notice or maintenance announcement. If other users are reporting the same error, wait for the service to recover and try again.
Check the causes in order. The first three are also common, so this error does not automatically mean the relay service is down.
Low cache hit rate or unexpectedly high cost in Claude Code?
Low cache hit rate or unexpectedly high cost in Claude Code?
It’s almost always the default attribution header — every request carries a dynamic session ID that blows out the upstream prompt cache.In CC Switch → Edit Provider → Config JSON, add one line to Recommended whether you’re on native Claude or a third-party model. See Disable Attribution Header for details.
env: